Like many other Canadians, we have been living the roller coaster of Blue Jays baseball! My husband is a big fan, so we have been following the team since spring training. However, since they began their upward climb at the trade deadline, we have been eating, sleeping and breathing the Blue Jays! Baseball isn’t my favourite sport, but the more I watch, the more I enjoy it. It’s been fun to get caught up in the hype, when the whole country is rooting for a team. It almost feels like the Olympics. We were very happy that they won last night, and will be cheering them on tonight!
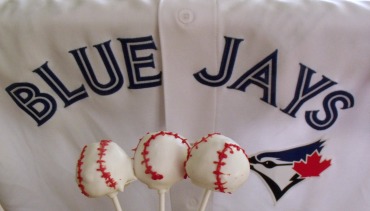
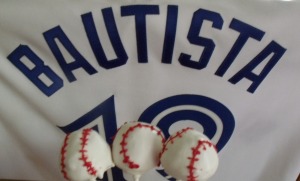
Once the Blue Jays made the playoffs, I wanted to make a baseball themed treat. Cake pops came to mind, because they’re round like baseballs! These would be great for a World Series celebration, or for a Little League team party.
I have a cake ball maker (I talked about it in this post) and I often use it to make cake pops, but this time I wanted to try the original method (crumbling cake, mixing it with frosting and forming balls.) If you have an electric cake pop maker or cake pop pan, you can use it. Bake the cake balls using your usual recipe, and then follow the directions to dip and decorate them starting after the balls are formed.
Honestly, I think I’ll stick to the cake pop maker next time. It’s quicker and easier, and gives you more uniformly round balls. I’ll share the recipe I use sometime soon! The crumbled cake balls with icing do taste really good though!
This is less of a recipe than a process, and can be a bit of a long one. Set aside 3 – 4 hours (with breaks!) to make the cake pops. I don’t suggest tackling another multi-step project simultaneously! I did these and an adorable Halloween treat (which you’ll see shortly) on the same day and nearly drove myself insane.
Now let’s get started (if I haven’t scared you off yet!) I’m using the process described by Bakerella in her book (and here on her website)
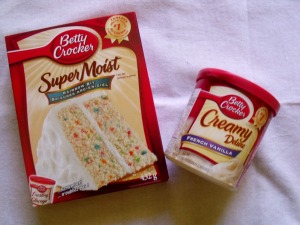
All you need to start is a cake mix and a can of icing. Store-bought is easiest, and gives you the most consistent results. Because we’ll be coating these with white coating, stick with a light-colored cake and frosting.
I’ve not tried these with a gluten-free cake mix, but I’m willing to bet it would work fine. If you chose a dairy-free cake mix and frosting (the ones you see in the picture are), you can make the cake balls themselves dairy-free. I’ve not had any luck finding candy coating that doesn’t contain dairy, but you can always decorate them using dairy free chocolate and candies.
Bake the cake as directed in a 9 x 13 inch pan. Let it cool completely (several hours or overnight.)
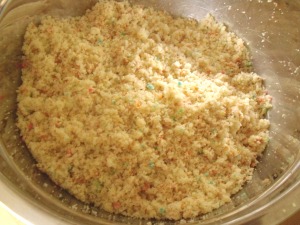
Crumble the cake into a large bowl. The easiest way to do this is to cut the cake into 4 or 6 sections. Hold each section over the bowl, break it in two, and rub the halves against each other. Then use your hands to break up any chunks. You want fairly fine crumbs. I didn’t bother trimming the brown off my cake because it was already speckled, but you can if you want more pure-looking cake balls.
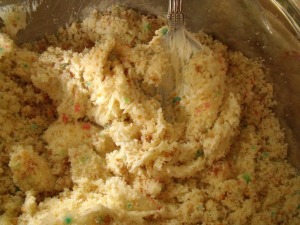
Add about 2/3 of the can of frosting to the bowl. Use a large spoon or spatula to gently combine the frosting and crumbs. There shouldn’t be any visible streaks of icing, and the mixture should hold its shape without being too wet. Add a bit more frosting if needed to achieve the right consistency. You won’t need the whole can.
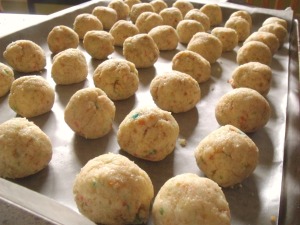
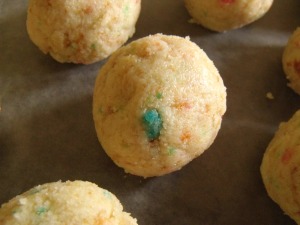
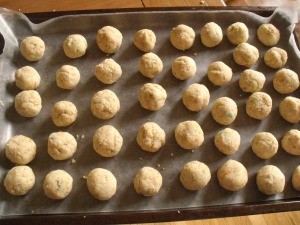
Roll the cake into 1 ½ inch balls, and place on a waxed paper lined baking sheet. Bigger is not better here – most of my failures were balls that I’d made too big. You should get between 40 and 48 balls.
Freeze the cake balls for about 30 minutes, or place in the fridge for several hours.
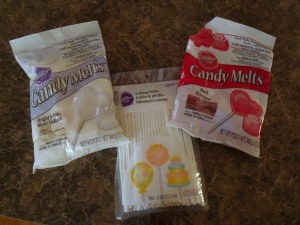
To decorate, you’ll need candy coating. You can buy it in bags like this at craft stores, or from bulk food stores. You’ll need 2 bags (about 680 g. or 24 oz.) of white, and about ½ bag (170 g. or 6 oz.) of red. You’ll also need lollipop sticks, which you should be able to find at craft stores.
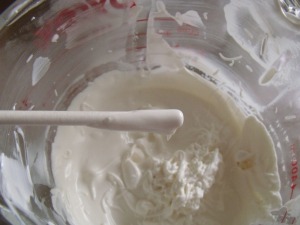
Fill a 2 cup glass measuring cup with white candy coating wafers, and add a teaspoon or two of shortening. The shortening helps to thin the coating and make it easier to dip. I’ve found that the older my candy coating is, the more shortening I need to get it fluid. If you’ve just bought yours, you won’t need too much. I bought the red and white coating in June for a Canada Day project that never happened, so it needed a fair bit of shortening.
Microwave the candy coating on defrost (or 50% power) for 30 seconds at a time, stirring frequently, until it’s completely melted.
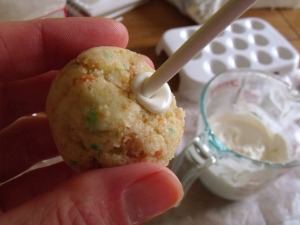
Take 10 – 12 of the cake pops out of the freezer at a time. Dip the tip of a lollipop stick into the candy coating.
Insert the stick into a cake ball, pushing it no more than halfway through.
Once each ball in the batch has a stick, return the pops to the freezer for 5 – 10 minutes. They don’t need to stay upright, you can lay them down on a baking sheet. After 5 – 10 minutes, transfer the pops the fridge.
Repeat with the remaining cake balls.
Here’s a tip – the colder the cake pops are, the less likely they are to fall apart or fall off the stick. But if they’re too cold, the coating will be clumpy and might crack. Don’t leave them in the freezer for too long, but only take a few out of the fridge at a time, and stick them back in if they’re getting warm.
Now it’s time to dip!
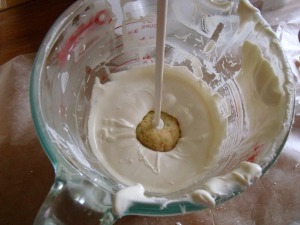
Hold a cake pop by the stick, dip it straight into the candy coating, and pull it back up. Don’t leave the pop the coating too long, or move it around too much, or you’ll have a casualty.
Very gently tap the stick against the edge of the cup, rotating the pop to make sure the whole surface gets covered. Bakerella suggests holding the pop with one hand and tapping that wrist with your other hand, to make the sure the pop doesn’t fall off.
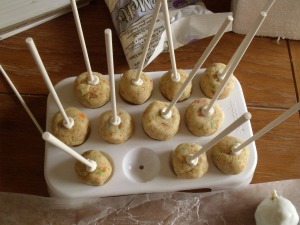
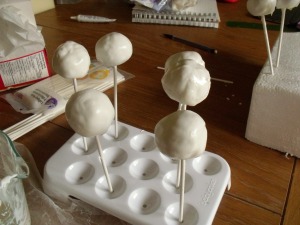
When all of the excess coating has dripped off, place the pop upright to dry. I have this handy little holder that came with my cake pop maker.
You can also use a block of Styrofoam. You can get one at a craft store…or use a knife to hack a piece off the Styrofoam packaging you found in the shed. ( I think it was from the firepit – which we bought in August…) Wherever you get your Styrofoam, poke holes in it with a lollipop stick and place the pops in the holes to dry.
Let the white coating dry completely ( at least an hour.)
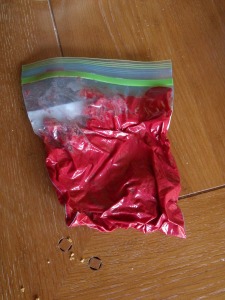
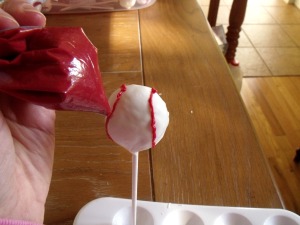
For the baseball stitching, microwave some of the red coating with a bit of shortening in a small bowl. Scrape the melted coating into a heavy duty freezer bag. Don’t use a regular sandwich bag – it may spring a leak.
Cut a tiny bit off one of the bottom corners to make a piping tip.
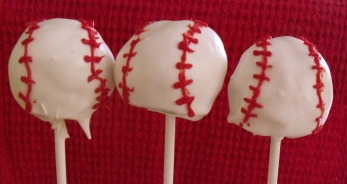
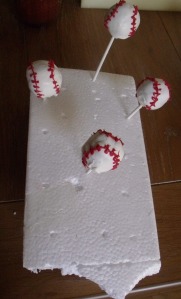
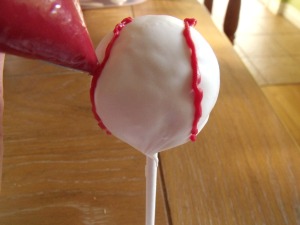
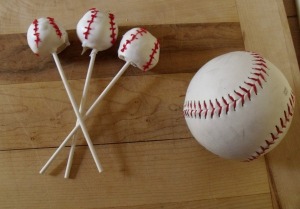
Pipe a loop on each side of the cake pop, with the middles of the two lines closer together than the ends.
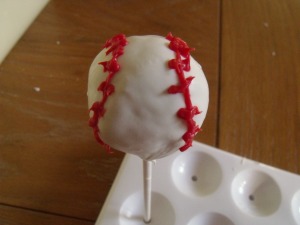
Pipe small lines across each line to simulate stitches.
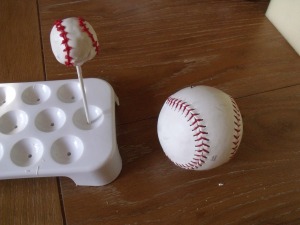
If you’ve got a baseball around, grab it for some inspiration!
They’ll all look a bit different and that’s totally ok!
Once the stitching has dried, the pops can be stored in an airtight container.
Play ball!
Who are you cheering for in the pennant race? Canadians, are you on the Blue Jays bandwagon?
You can try to bat flip one of these into your mouth!

These are great! As a Cubbies fan, I’m hoping I have a reason to make them in the near future. 😉
xo, Jessica
http://www.semisweettooth.com
LikeLike
Hopefully you’ll be making World Series Cake pops! I’d love to be too, but our chances are looking pretty bleak. I’ll be cheering for the Cubs once the Blue Jays are out!
LikeLiked by 1 person
Haha, our odds aren’t looking much brighter.
LikeLike
So cute! Love the Jays and these would be perfect for a themed party if they hopefully get to the final round. Thanks for the idea.
LikeLike
Let’s hope they make it past tonight! They would be great for a World Series party!
LikeLike
These are so cute! I can definitely see how the cake pop maker is easier, though, that is a lot of work! We got to see the Jays play when were in New York, which was a really neat experience. Go Jays! Thanks for sharing with the Wednesday Showcase!
LikeLike
With the cake pop maker you do still have to dip them, but since they’re solid cake they’re a bit more forgiving (aka they don’t fall apart quite as much!) You’re lucky to have seen the Jays! My husband is very disappointed he didn’t get to a game this year.
LikeLike